
KR-RS-F150M / KR-RS-F150MS – Installation Guide
My Truck Does Not Have The Glovebox Light Connector...
OPTION 1: If your kit includes only the ring terminal:
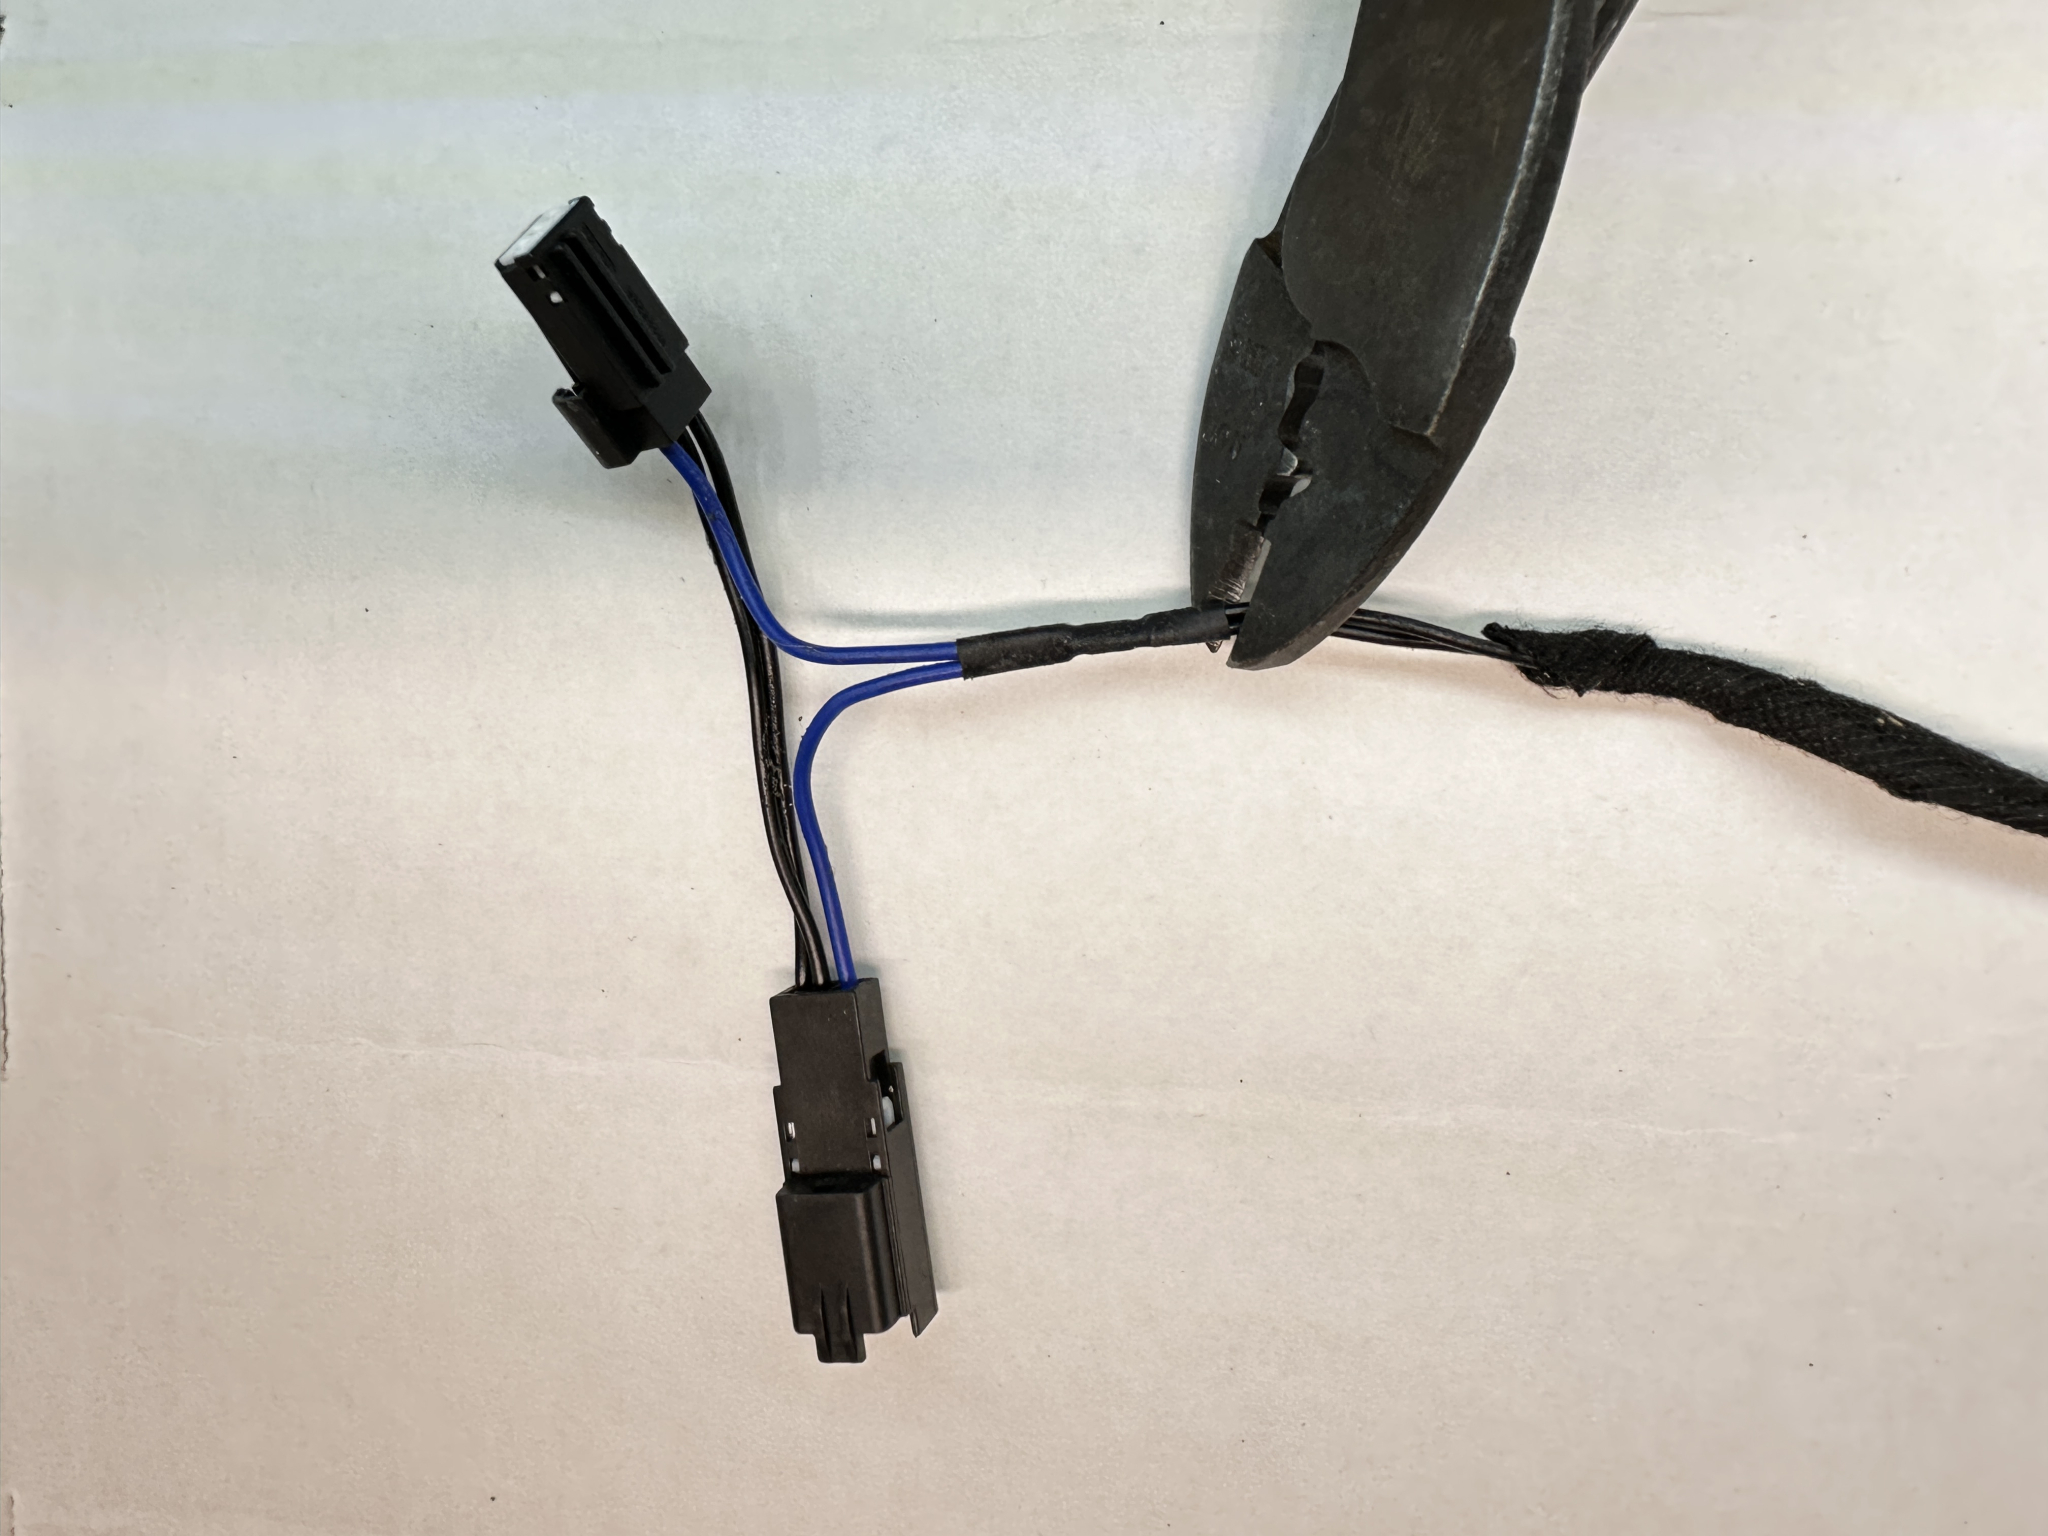
STEP 1: Cut the glovebox light t-harness end from the main harness
Removing some of the tape as shown in the image will reveal the wiring. Simply cut the wires as shown. They are small so good scissors or even a pocket knife will work fine.
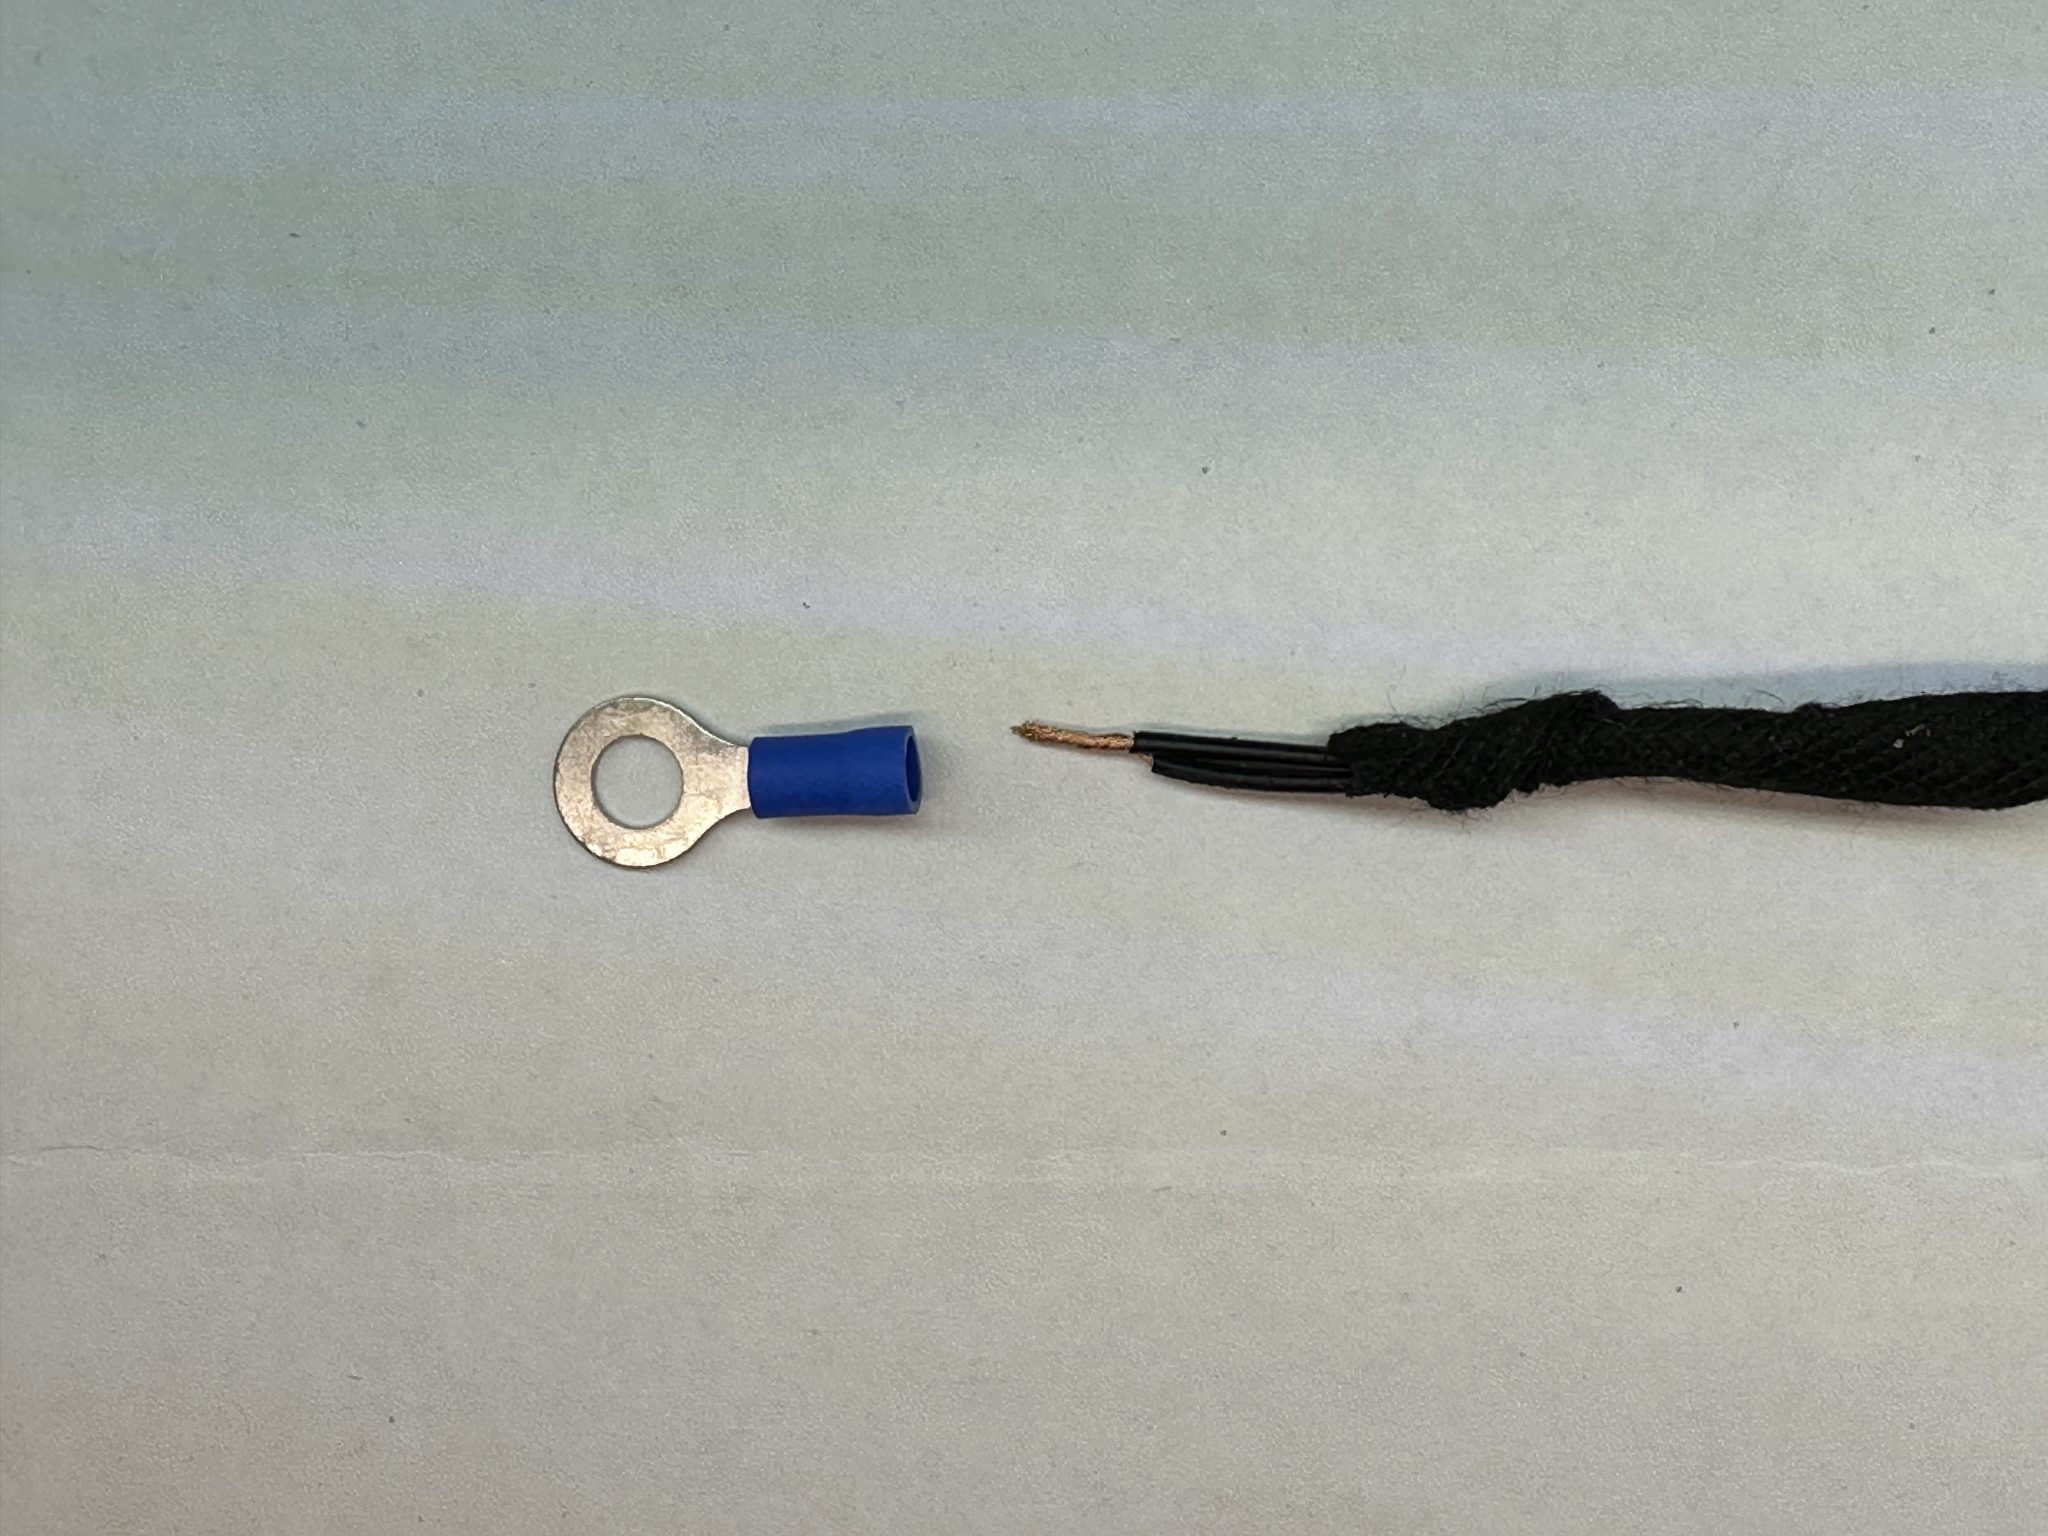
STEP 2: Strip the end of the 2 wires & twist them together
Strip about 1/2" (12mm) of the insulation off the wires & twist them together. If you do not have strippers or cutters, you can carefully "shave" the ends with a knife/razor or heat the end with a lighter to soften the insulation (do not burn it or yourself) & strip the wires with your fingernails. NOTE: IF you do not have pliers or crimpers to crimp on the ring terminal, strip approximately 2" off the end of the wires and skip to step 4.
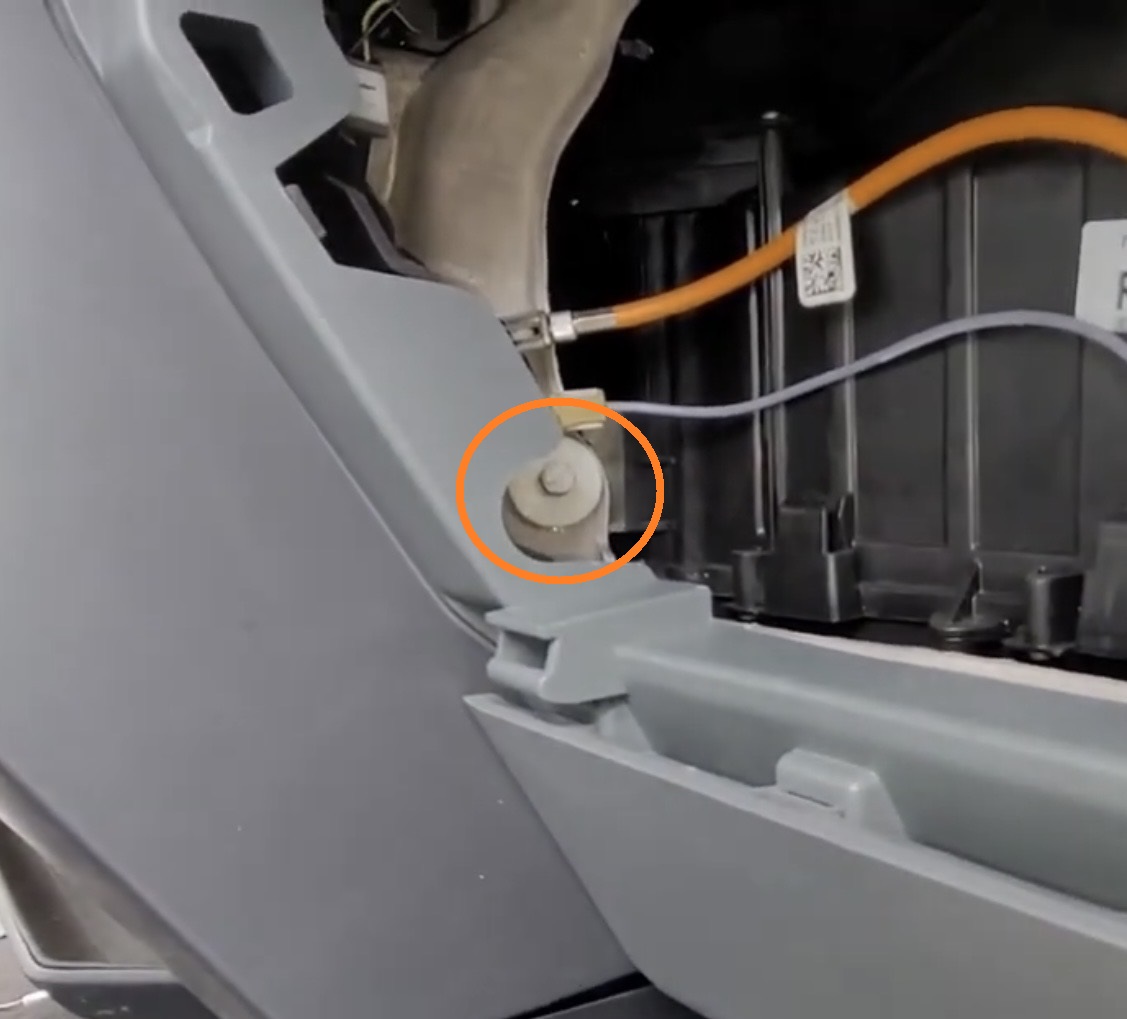
STEP 3: Remove the 10mm bolt from the left side of the glovebox opening
Use an 8mm (5/16") wrench/socket to loosen the bolt on the left of the glove box opening. Large/locking pliers may also work well.
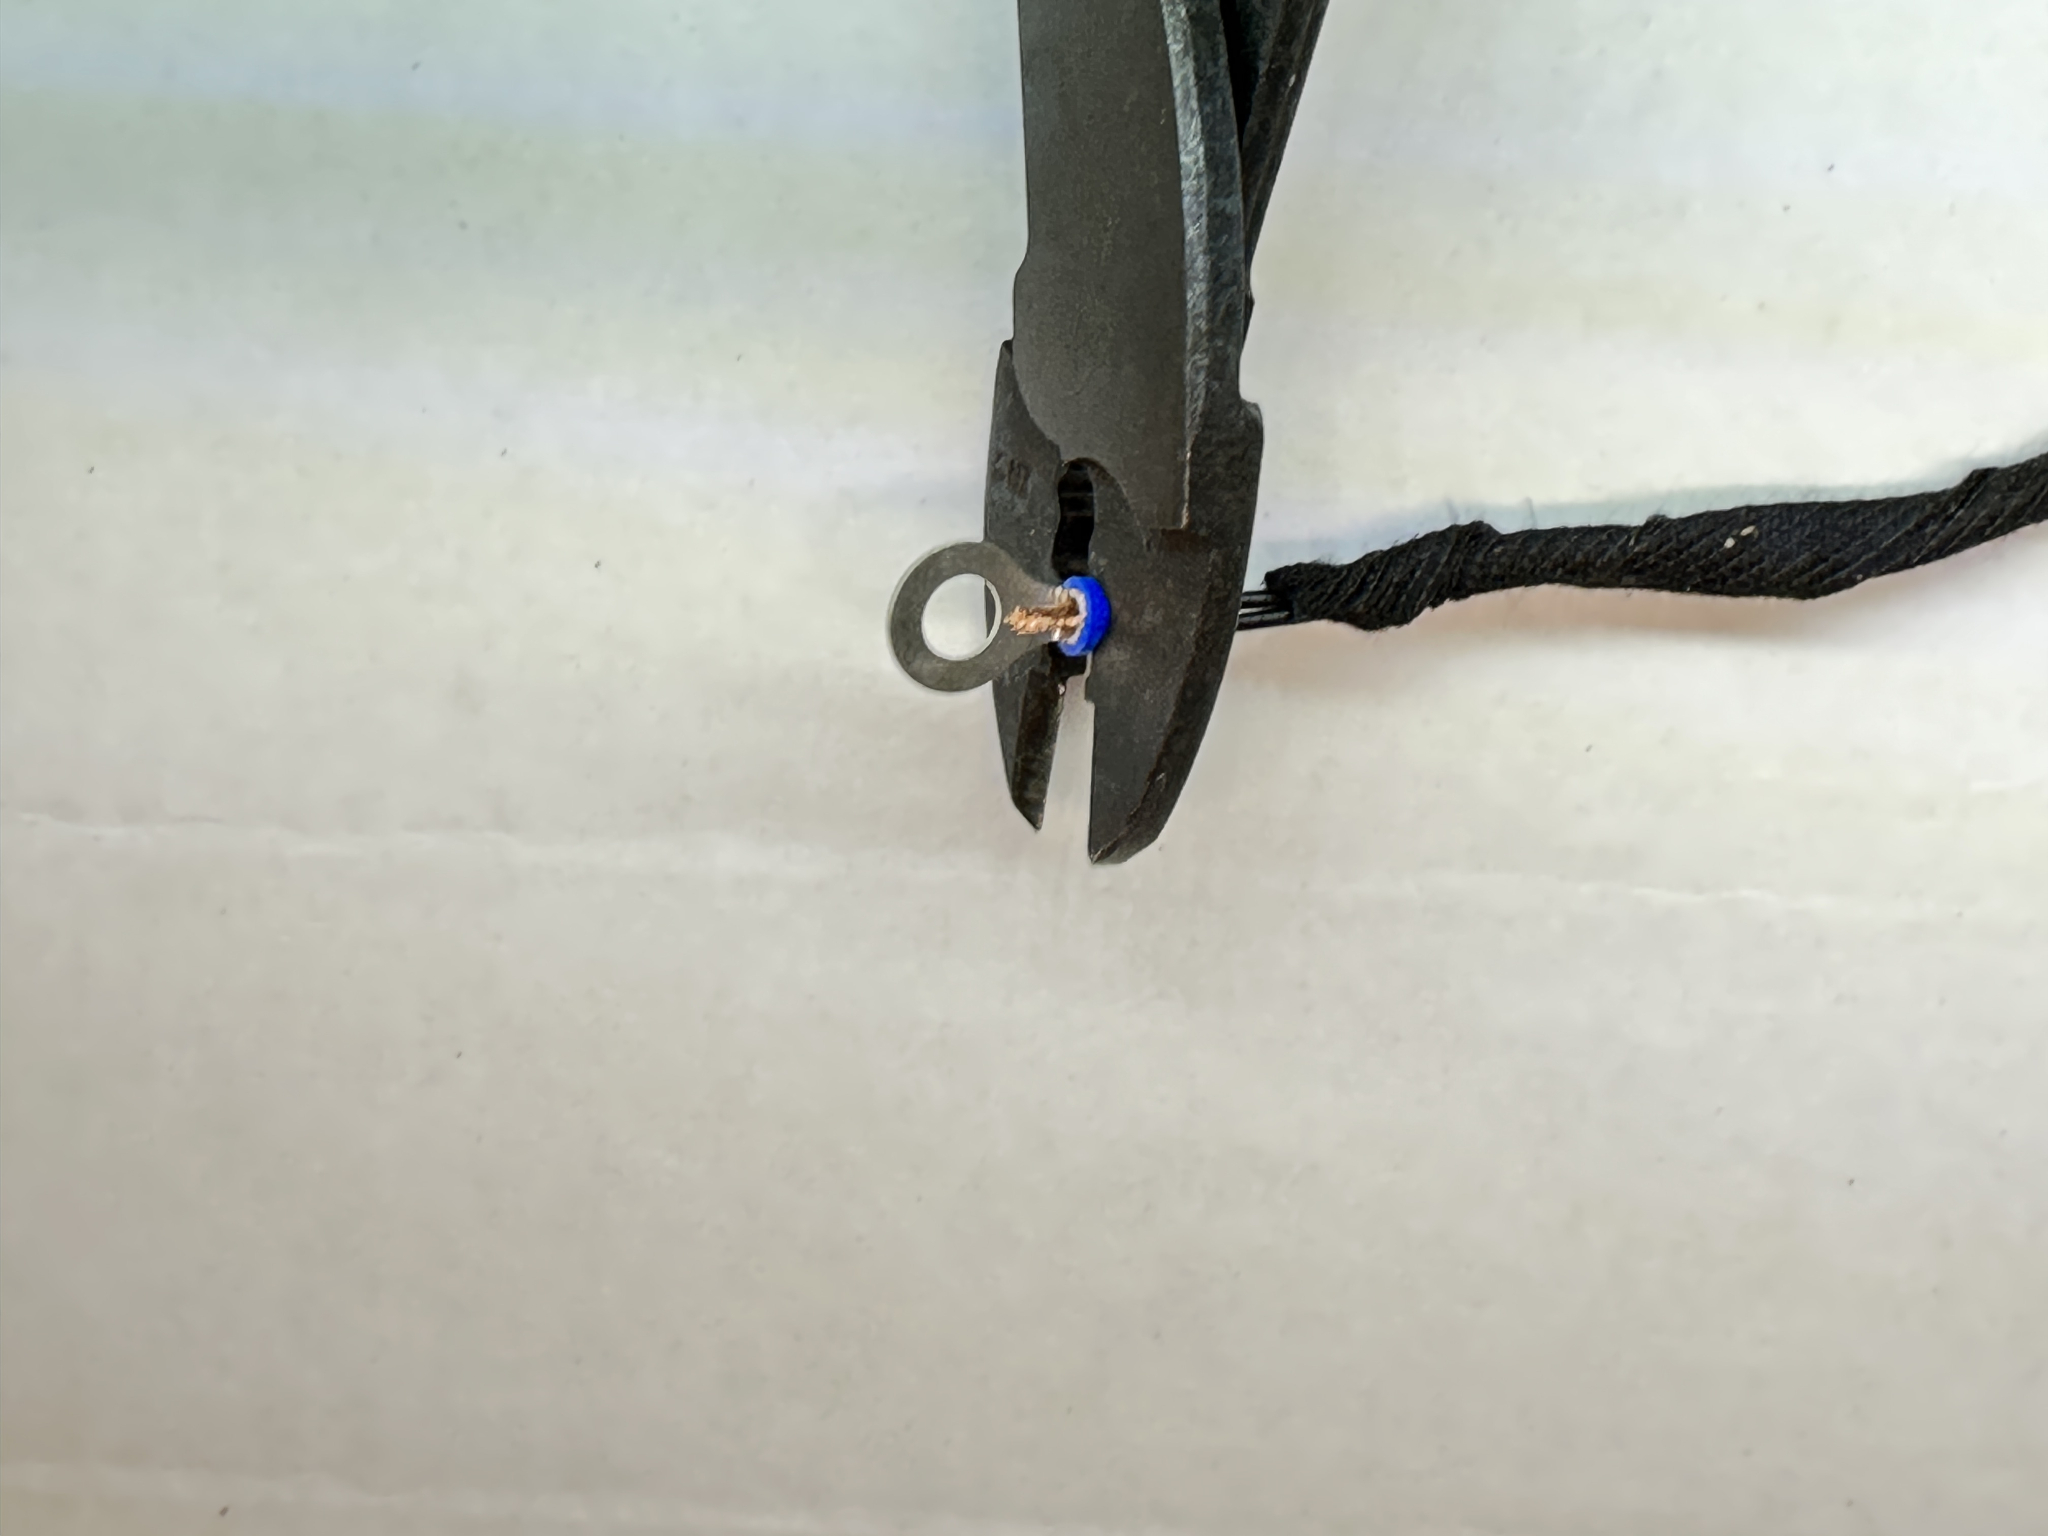
STEP 4: Crimp on the included ring terminal and attach it to the bolt.
Use wire terminal crimpers or needle nose pliers to crimp the ring terminal on. Slide it onto the bolt and tighten the bolt back down.Alternative: if you do not have crimpers, you can wrap the twisted, stripped end of the wire behind the large washer on the bolt shaft and tighten it back down. Don't tighten so much the wire is accidentally cut by the washer but just enough that the wire cannot be pulled out by hand.
OPTION2: If you kit includes a connector adapter w/ ring terminal already attached:
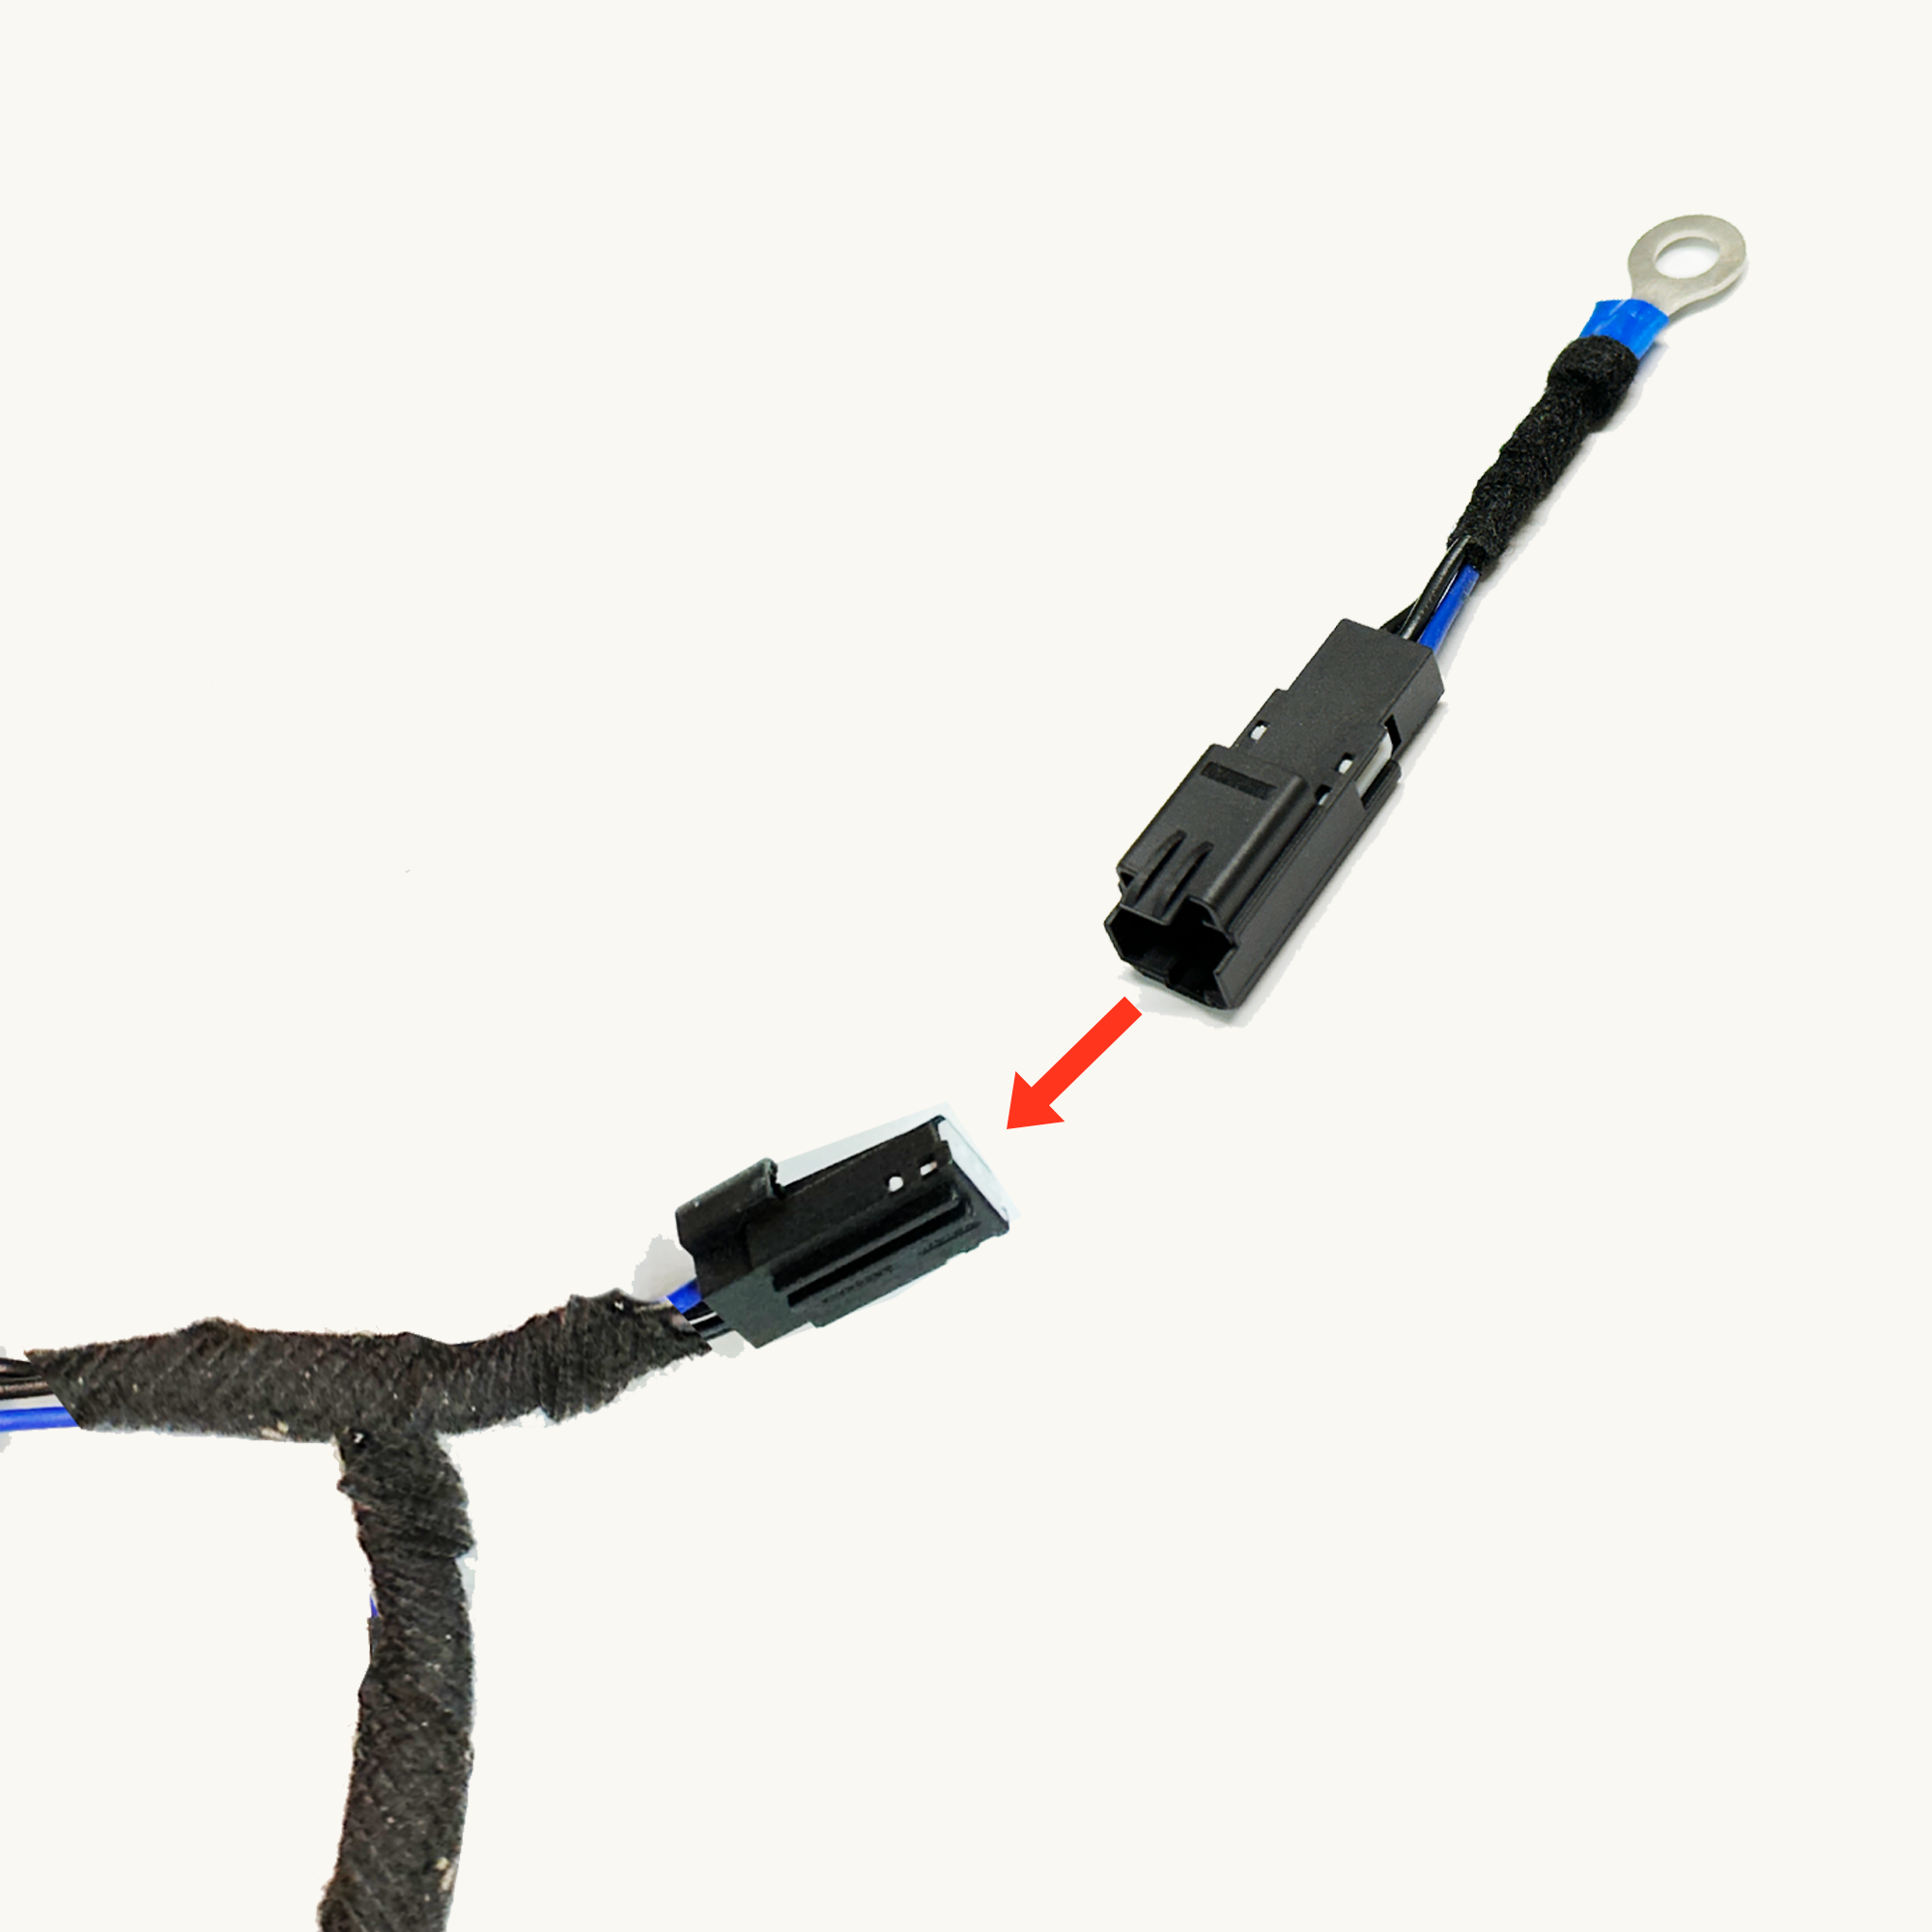
STEP 1: Plug the adapter into the glovebox light connector on the t-harness...
The unused connector can be taped to the harness or just tucked away as to not interfere with the glovebox closing/opening.
STEP 2: Remove the 10mm bolt from the left side of the glovebox opening
Use an 8mm (5/16") wrench/socket to loosen the bolt on the left of the glove box opening. Large/locking pliers may also work well.
